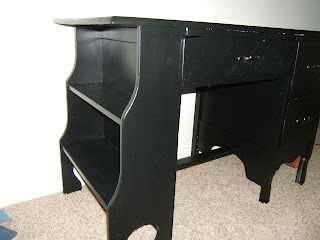
- Furniture to refurbish
- Electric sander
- Paint
- Paintbrush - I used a foam brush to help avoid brush strokes
- Drawer hardware (pulls or handles)
Instructions:
- Wipe down the furniture with a clean, damp cloth.
- Using the electric sander, sand the furniture. If you sand it to the wood (thus removing the old pain), painting will probably be easier.
- Begin painting. Make sure that you apply an even coat. You may need to paint more than one coat in order to have adequate coverage.
- When the paint is dry, apply the new drawer hardware
Here is the finished product: (sorry...these pictures didn't turn out the greatest)

If you are able to find a decent piece of furniture, refurbishing can be an affordable way to give it a new look. Including the price of the desk, this project cost me less than $50.


Wow Lisa! The desk looks awesome, you are amazing! I love this blog :)
ReplyDeleteThat was looking really cool. I have recently refurbished my office furniture. It feels great as i have saved more than 75 percent of money and the furniture is looking new. For more information visit: Office furniture liquidators
ReplyDelete